Feeds:
Posts
Comments

Archive for the ‘Vegan’ Category

Vegan Ice Cream

Since I have become intolerant of the lactose, one of the things that I miss most is ice cream. Non-dairy ice cream is so expensive. What I used to spend on a gallon, I now spend on a pint.

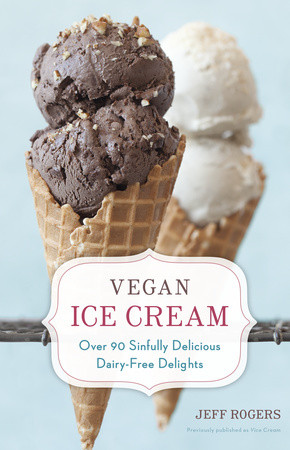
No more. Enter Vegan Ice Cream: Over 90 Sinfully Delicious Dairy-Free Delights by Jeff Rogers.

On some level, I feel like I should have been able to figure out these things on my own. The general premise for all the recipes is the same: non-dairy milk + whatever you want to flavor it + a sweetener of some sort, chilled and then churned/frozen in an ice cream maker. In fact, once you figure that out, the recipes seem a little repetitive, but that’s the only criticism I really have, and I think it’s a minor one.

The introductory material was fantastic. He introduced all the ingredients he would be using and gave substitution options for those with taste preferences or allergies. He also gave a straightforward account of how to make coconut milk from both fresh and dried coconut (that was my favorite tip, because I don’t have time to mess with a real coconut).

The recipes are so easy. This is an especially excellent book for beginner ice-cream-makers (the people, not the machines), because it will teach them to learn proportions and how to recognize when the mixture is the right texture for each step of the process.

Now let’s get down to business. I made some of the recipes just like it says to make them, but I also played around with it. My favorite thing that the book did was build my confidence to experiment with the recipes. I also enjoy that, of all the recipes I tried, there wasn’t a dud. They’re all delicious, and you need them in your life.

You’ll have to get the book to get his recipes, but I’ll tell you some things I did. I tried the following recipes his way, but I also did a tweaked version. My four favorite recipes in this book:

1. Espresso (of course) – I made it with hazelnut milk. RECOMMENDED. It was like eating a hazelnut latte.

2. Pumpkin – I don’t really like the taste of cashews. I get why they’re featured in a lot of the recipes, though. Because of their unique texture, they’re the simplest to use to achieve the consistency ice cream needs. The simplicity doesn’t solve my taste issue, though. Except with the pumpkin. When I added the pumpkin and the pie spices, I couldn’t even taste the cashew. It was delicious. And the texture was indeed perfect.

3. Peach – Armed with peaches recently plucked from Mom and Dad’s trees, I used almond milk and Grade B maple syrup. It tasted like peach cobbler. Bliss.

4. Peppermint – Peppermint ice cream is my most favorite ice cream ever. It’s a marvel – it’s crisp and creamy at the same time. Because I believe that you just can’t mess it up, I went full-on rogue with this one. Coconut milk (homemade really is best, but use the full-fat version in the can if you must), pulverized candy canes, and one squeeze of agave nectar (a little dab will do). It was so good I am tearing up just at the memory. I froze it in popsicle molds. Happiness on a stick.

Basically, if you want the joy of ice cream without the dairy, you need this book.


FTC Disclaimer – I received this book from Blogging for Books in exchange for an honest review.

Read Full Post »

With the world being what it is and kids moving in and school starting and two of my classes for the semester getting canceled, I feel the need for comfort food this week. Sunday at Supper Club, I made chicken and dumplings (that post coming later this week, along with a vegan version that I not-so-secretly think is better).  Last night, on what would have been my first night of classes, I stayed home and built my own casserole. I used to use this skill a lot when I was in college because 1) it’s highly cost effective, and 2) it lets you use up ingredients of which you have a freakish abundance.

Enter The Zucchini.

photo (1)

(Guest appearance by the Gosdins’s Swarley. Observe cat-to-zucchini ratio)

The vegetable pictured above is not the actual one I used last night. The one pictured met its fate in the form of zucchini mini-pizzas, each slice serving as the crusts.

That’s right.  I have been the possessor of two such items in the last few weeks. My sister and brother-in-law have been equally blessed. This is what happens when a certain someone is retired and has the idea to “see how big they will grow.”

What is one to do when one is in possession of such a gargantuan courgette? Casserole time.

To build your own casserole, you will need a fair amount of each of these things:

  • a grain
  • a protein
  • veggies
  • something that binds/moistens (somewhat optional – see discussion below)

It’s also a good idea to have something to top it with.  This is not essential, but it makes it look pretty. It also adds a little flavor.

For my casserole, I used brown rice, ground beef, zucchini and onions, and shredded cheese as both binder and topper.

I know that my casserole is not anything close to vegan, despite the tag, but the basic guidelines give you something to work with.  As I normally have no meat in the house, I usually make vegetarian or vegan casseroles. I will use beans as the protein in a vegetarian dish. If I am making it vegan, I will toss the grain in a couple of tablespoons of oil, as that helps it hold together.  Holding it together, however, is not at all necessary. It’s really okay if it all falls apart on your plate. So if there is enough moisture in the veggies (true of most vegetables, particularly if you toss them with some tomatoes), you don’t really need anything to keep it from drying out. Dried fruits and chopped nuts make for a pretty topper for a dairy-free dish.

Because I did not have leftover rice, I had to make it anew, so I started that first. While the rice was cooking, I took my trusty knife…

photo 1

(shameless plug and full disclosure – if you buy it at this link, you’re buying it from me)

…and started chopping.  First, I diced The Zucchini into bite-sized chunks.

photo 2

It took my large stand-mixer bowl to hold all of them. That is a lot of zucchini. There was just enough room left in the bowl to add one chopped onion.

I browned about a pound of ground beef in my largest skillet (I’ll spare you the picture of that) and then added the vegetables in to saute briefly but mostly to combine the casserole elements.

The casserole is easy to assemble.  I just layered the rice, veggie/protein mixture, and cheese twice (i.e., alternating with two layers of each) and baked it.  Then it looked like this:

photo 3

Well, half of it looked like that.  There was so much zucchini that I ended up baking a second one in the skillet. I have so much casserole in my life right now.

Casseroles are not pretty foods, but what they lack in aesthetics, they make up for in taste. This one was wildly successful in that endeavor.

So to recap, for those of you who like specifics and don’t want to end up with a spontaneous extra casserole:

1. Preheat oven to 350 degrees.

2. Gather – and keep in mind, leftovers make excellent casseroles:

  • 2 cups of cooked grain
  • 2 cups of cooked protein (e.g., beans or meat or your choice)
  • 2 cups of chopped veggies (if frozen, steam first and drain, or your casserole will be soggy)
  • 1 cup of shredded cheese (or 2 T oil – I like to use grapeseed oil) – optional
  • 1/2 cup of topper (e.g., nuts, dried fruits, more cheese, those french-fried onion strips, cracker or chip crumbs, etc.)

3. Mix protein and veggies together.  

4. Layer grain, veggie mixture, and cheese as often as the vessel you’re baking it in can hold it.

5. Sprinkle topper after final layer.

6. Bake at 350 for 25-30 minutes.

And there you have it! A money-saving, belly-filling, abundance-producing, comfort food meal. Enjoy!

Read Full Post »

Because I knew this week would be a short week but also a work intensive week (y’all – it took me two hours to alphabetize my CDs last night.  Nothing was in its correct case. Nightmarish.), I did my cooking on Saturday when I just so happened to have people over for brunch.

photo (4)

The menu (in addition to copious amounts of cheap champagne mixed with various assorted nectars, of course):

1.  Mom’s Sausage Balls

I grew up in Texas, so I have never been to a potluck where there were no sausage balls.  And I can’t remember a moment in my childhood when they weren’t magically hiding in a Ziploc bag in the freezer.  These little glories freeze beautifully, both pre- and post-cooking, but I have yet to make a batch big enough that I felt compelled to freeze them instead of just baking them all and keeping them in the fridge to snack on for a few days.  I don’t do this often, though – I would be the size of a house.  Health food, they are not.

The real beauty of this recipe is that you just can’t mess it up.  You mix three ingredients, roll them into 1-inch balls, and bake them at 350-375 for 20 minutes.

It doesn’t even really seem to matter how much of each ingredient you use.  Mom uses half a pound of sausage, four cups of grated cheddar, and two heaping cups of baking mix (she uses Bisquick but you can also make your own).  I used a whole pound of sausage, a large log of goat cheese (DO IT…SO GOOD!), and three scant cups of baking mix. You can look all over the Internet for recipes, and most of them will have slightly different measurements.  If it sticks together enough to roll into a ball, it will work.

2.  Vegan Mini-Cinnamon Rolls

I originally chose this recipe for its adorableness, but with a few minor tweaks, I was happy to discover that it can also be vegan.  I didn’t think it was possible until I was reading the crescent roll label at the grocery store, trying to figure out just how many pills I would have to take to partake of them.  Zero.  Zero pills.  The original Pillsbury Crescent Roll is lactose-free.  So I did a little digging, because lactose-free dough sometimes means vegan, and although PETA does give the disclaimer at the bottom that it was probably processed in non-vegan ways, it lists the product itself as “accidentally vegan.”  If it passes PETA’s standards, I guess it passes mine (although if I were to go all-out vegan, I would be one of those religious kind of vegans who grinds my own sugar and never eats processed foods, just in case, which – i.e., my commitment to laziness – is at least part of the reason that I have yet to go all-out vegan).  If you are a religious kind of vegan, you can also make your own crescent roll dough pretty easily, although I would totally sub coconut oil for the canola oil, because DELICIOUS.

To veganize the recipe in the link above, you brush the dough with coconut oil instead of butter and use coconut milk instead of regular milk in the glaze.  If you use full-fat coconut milk, it will be so creamy you’ll want to roll around in it.  And I’m using maple syrup in every glaze I ever make from now on, because that was fantastic.

3.  Farmers’ Market Veggie Frittata

Frittata – another thing that’s hard to mess up.  Full disclosure – the only things from the Farmers’ Market I used in this recipe were the tomatoes. The shredded potatoes and spinach were totally frozen.  Organic…but frozen. You can use any vegetable you want, though, and fresh is better for this recipe.

  1. Preheat the oven to 350 degrees.
  2. Take some eggs.  I like to make a lot at a time, particularly if I’m feeding other people, and I own that big ass skillet in the picture, so I use a full dozen. If you are using a smaller-than-twelve-inch-deep-dish skillet, I recommend using fewer eggs.  Then again, I like a frittata where egg is not necessarily the star, so if want more of an egg focus and you use fewer additional ingredients, you can probably get away with a dozen eggs in a smaller skillet.  It just all has to fit when it goes into the oven.
  3. Whisk the eggs and season them generously with salt and pepper and any other seasoning you like (a healthy dash of herbs de Provence medley – marjoram, summer savory, thyme, rosemary, lavender – is nice). Set aside.
  4. Heat a dollop of oil on the skillet and add crushed garlic (two-ish minutes on medium heat). Add whatever vegetables you are using – washed and chopped, of course – to the skillet and toss them around for a little bit (3-4 minutes).
  5. Pour the eggs over the warmed vegetables. Stir gently a couple of times in the first minute, but then let it sit for a few more to set the bottom of the frittata.
  6. Put the skillet in the oven and bake until the frittata sets completely.  Mine usually takes about 15-20 minutes, but the time will vary wildly depending on a number of factors, such as how long you kept it on the stove, how warm the vegetables were when you poured the eggs in the skillet, how crispy you want the edges, etc. Just make sure you keep it in the oven until you can press down on the center without it being wobbly.

And now, a word about adjustments:

I’m only three weeks into the project, and my refrigerator and freezer are bursting with leftovers.  I have shared at least two meals a week with other people.  I even brought Cavatini leftovers to leave in the fridge at work for the summer RAs to have, because I can’t finish them all.  I have so much food it is taking over other people’s refrigerators.

I know.  There are worse problems to have.  But when the novelty of raining leftovers down on all my people wears off (which, if the past is any indication, will happen in about two more weeks), there could be a lot of food that goes to waste if I don’t scale back a bit.

So I’m scaling back by playing it by ear.  I will keep my three main categories – Mom’s recipes, vegan recipes, and farmers’ market recipes – but if Mom’s recipe makes eleventy dozen meals (and a lot of them do – we were a family of four, and she’s also a fan of leftovers), I will either skip one of the other categories that week or combine them.

Also, that bread business?  Let’s scale that back to a couple of loaves every other week, or just when I need it.  Bread takes up a lot of space in my tiny freezer, and I do not eat a loaf a week. Apparently, my planning self thinks that I have a brood of children I’m feeding.  But my freezer begs to differ.

Read Full Post »

This week has been pasta-intensive.  It has been amazing, but I feel like I didn’t get anything done except nap.

1. Mom’s Cavatini

This might be my favorite thing that my mom makes.  When I make it, I adjust her recipe by having more pasta and less meat.  I even wrote it at the top of the page where I copied it down, like I would forget:

photo (6)

In recent years, however, I’ve been keeping the pasta about the same and replacing half (or all) of the meat with spinach.

The recipe, as my mother has it written:

  • 2 lbs. ground beef
  • 3/4 c. each of curly, shell, and macaroni noodles
  • 3 tall skinny cans of tomato sauce
  • 1/4 tsp. each – oregano, celery salt, garlic salt, and pepper
  • 1/8 tsp. thyme
  • 1 large onion, chopped
  • 2 pkgs. mozzarella [that’s 32 oz. of cheese, for those who are wondering]
  • 2 pkgs. pepperoni

Brown meat, onion, and seasonings.  Add tomato sauce and pepperoni. Simmer 5 minutes. Add cooked noodles and simmer 5 more minutes.  Take off stove; add mozzarella; serve.

Upon re-reading the recipe, I noticed other changes I make:

  • I only use one type of pasta, unless what I have on hand happens to be remnants of several different shapes.  But three pastas are not something that I do on purpose, even though I must admit it makes the dish prettier.
  • I use my own homemade spaghetti sauce, which includes onions, pepper, and a whole lot of seasonings, so I exclude the onion and spices from the recipe.

I made cavatini twice (three times if you count the next recipe in the list).  My friend Stephanie came over on Tuesday.  I left out the pepperoni and kept the sauce separate from the pasta, and I left the cheese on the side as well.  So I guess that was build-your-own-cavatini night.  I turned right around and made another batch for the part-time staff Wednesday night at our meeting. This time, I threw it all together as the recipe instructs, because one pot is easier to carry than three.

I also made two loaves of beer bread for staff.  One of them remarked, “I guess this is the closest you’re going to come to buying us alcohol.” Yep. I had just enough bread left over to have the best toast on the planet for breakfast the rest of the workweek.

2. Vegan Cavatini (aka, Pasta Primavera)

Leave in the spinach, add another vegetable or two (I vote yellow squash and orange bell pepper), and leave out all the meat and cheese.  You will have a meal that is healthier but still delicious. Make sure your pasta doesn’t have egg in it, or that won’t be vegan.

3. Farmer’s Market – Roasted Broccoli

Broccoli is not my favorite vegetable. I have always thought it was okay.  Then in 2002 when I started having digestive issues and couldn’t keep much of anything down for months, the smell of broccoli sickened me.  It’s been on my list ever since.

But I found some this week at the market, and since it’s starting to get too hot for it to grow, I thought I’d give it a chance this week.

Chop up the broccoli and a red onion, and roast them in grapeseed oil.  It’s so good, it might redeem broccoli for me.


So that’s the week in food!

Read Full Post »

Today marks the end of Week One (Keep) of my Getting It Together summer project.

The Food:

The three planned recipes for the week were Mom’s chicken salad, black bean and pepper fajitas (vegan), and ratatouille (farmers’ market).  Two of the three actually happened.

Until very recently, I didn’t have a chicken salad recipe, because until very recently, I hated mayonnaise. That doesn’t seem to be the case anymore.  Apparently.  My brand new favorite way to make chicken salad is with rotisserie chicken – which is 1) almost as inexpensive, 2) far less disgusting, and 3) way less work than roasting my own – with grapes, apples, dried cranberries, celery, pepper, and two parts mayo to one part mustard.

For the vegans in the audience, this recipe is also delicious if you sub Vegenaise  for the mayo and chopped up Chik’n nuggets (I think they’re made by Boca?) for the chicken. This also makes the expensive faux chicken nuggets go further, which makes my bank account happy.

The chicken salad that I grew up eating, however, is simpler.  For my mom’s recipe, I used one chicken breast (baked and chopped into pieces), two boiled eggs, one half cup of mayo, and a couple of spoonfuls of mustard.  Mom usually seasons with just salt and pepper, but I added a little parsley, basil, and oregano. It’s not the healthiest meal, but I got five sandwiches out of it, making it one of the least expensive meals I’ve had in a while.  Throw a few carrot sticks or an apple on the side, and you have a nice lunch.

The vegan  recipe I managed was black bean and pepper fajitas. In a skillet, I sauteed some onions and garlic.  Then I added cumin, roasted red peppers, and black beans.  I let it all cook together for a while (about 15 minutes on medium low).  Then I spooned the mixture into some tortillas, spritzed it with lime juice, and that was it.  It could not have been easier. It was good the first time, but the leftovers – after everything had hung out and marinated in the fridge overnight – were amazing.

The ratatouille will have to wait for a week when I actually make it to the farmers’ market.  Turns out, it’s hard to get inspired by the farmers’ market when you don’t go.  Ahem.

I totally forgot about making bread.  I almost threw together some beer bread today, just so I could say that I made bread this week. But the plan was to make baguettes to go with the ratatouille…and neither of those things happened. I bought a day-old (i.e., half-price) loaf of sourdough at Ravelin.  That’s…not even close to the same thing, but at least I didn’t pay full price?

The Home:

I called this week Keep because “maintain” sounds so boring.  Maintaining is going about my workaday life, just slugging along.  It reeks of stagnation. Keep, on the other hand, sounds more nurturing.  I’m keeping a home.  I’m keeping my space livable.

photo (3) My cute coffee nook

You might be thinking, “What does it matter what you call it?  Just do it.” But that’s what I learned this week – it matters to me.  In fact, how I view this habit might just be the primary determinant of whether I keep doing it after summer’s over or go back to the way things have been.

Some things I learned this week:

  • Fifteen minutes hardly feels like any time at all.  I was surprised by how quickly it went by every day. The daily fifteen minutes in the kitchen was usually over by the time supper had finished cooking, so that didn’t seem like a big deal either.
  • I can do a lot in fifteen minutes.  I wanted to see if such a small amount of time would make any difference, and I also wanted to avoid getting burned out on my first week, so I stuck to the time limit pretty rigidly for this first round.  After only a quarter of an hour in every major area in the apartment, it looks ten times better than it did last week. I definitely cleaned up more than I messed up.
  • I don’t feel like I’ve spent any time cleaning this week.  This is the big one.  I am very protective of my schedule. If something seems like it’s going to take a lot of time, particularly long-term, I’m unlikely to stick to it. This even translates to people. The first sign that I’m really into a guy? When I don’t mind that he takes up a lot of my free time. So it’s important for a new habit to fit easily into the schedule without upsetting my daily flow.
  • In reality, I have spent a lot of time cleaning this week.  I have spent a collective three hours cleaning and organizing, which is about two and a half hours more than I usually spend.  But dividing the time up in a day-to-day process takes away the feeling that it’s some grand imposition, and that’s going to be what makes this new habit stick.

Overall, I am pleased with the week.  Now onto Week Two.

Read Full Post »

Now that I’ve established why I’ve taken on this project, now here’s the how.

The taquitos, sandwich fixins, and cereal made it into the grocery cart on purpose.  I like them.  They are delicious and convenient, and making them doesn’t heat up the whole house.  As much as I would love for every meal to be a slow food treasure, I have two jobs and two manuscripts to finish by the end of the year.  So for me, a stash of emergency taquitos in the freezer is a vital part of a workable meal plan.

I just don’t want it to be the only plan.

This summer, getting it together means eating well and eating healthier without breaking the bank.  Specifically, it looks like this:

1. Baking two loaves of bread a week – one to eat and one to share or freeze.

2. Making at least three big (i.e., at least two servings of leftovers) meals a week:

  • One meal from my childhood – a little shout-out to Mom
  • One meal inspired by what I find that week at the farmers’ market
  • One meal that’s vegan (because I have not forgotten you, New Year’s Resolution)

Each week, I will post what I make and share a few recipes with you.

Getting it together also means getting my apartment in order.  With the help of Apartment Therapy (both the book and the website) and Unstuff Your Life, and of course, my mother, who is the loudest of the voices in my head, I have divided the process into twelve weeks.

This week, I will be initiating the daily maintenance schedule that I will continue throughout the twelve weeks (and hopefully forevermore). The schedule requires a mere 30 minutes a day, which is about 25 more per day than I currently average in a week.  The first fifteen minutes will focus on a specific area of the apartment, and the last fifteen minutes will be spent cleaning the kitchen.  The schedule is as follows:

  • Monday – entryway
  • Tuesday – living room
  • Wednesday – writing nook
  • Thursday – bathroom
  • Friday – kitchen (the whole 30 minutes)
  • Saturday – bedroom
  • Sunday – wherever needed

The majority of the remaining weeks will be spent deep-cleaning and organizing a specific area of the apartment:

  • Week 2 – The B Word – Budgeting for the project
  • Week 3 – Welcome – the entryway and kitchen table
  • Week 4 – Sustain – the kitchen
  • Week 5 – Entertain – the living room
  • Week 6 – Create – the writing nook
  • Week 7 – Wash- the bathroom
  • Week 8 – Stash – laundry closet and craft storage
  • Week 9 – Adorn – bedroom closet
  • Week 10 – Rest – bedroom
  • Week 11 – Reflect – review project and look ahead
  • Week 12 – Celebrate – party!

Every Sunday, I will post a list of specific goals for the week and maybe – MAYBE – a before picture. By the end of the week, I will post a progress report.

Like I said on Sunday, I am not my mother. She doesn’t bake her own bread, and I don’t grow my own vegetables.  I’m also lactose-intolerant and eat less meat than my parents do, so I reserve the right to adjust her recipes to fit my needs and tastes. And until I can afford to hire a full-time housekeeper (which, for the record, is one of the first things I’m doing if I should ever become inexplicably and grotesquely wealthy), my kitchen floor will probably never stay clean enough for anyone to eat off it.

And I’m okay with that.

But I’d be lying if I said that I didn’t want to be more like my mother.  I enjoyed living in a clean house, and I enjoyed the homey atmosphere created by the smell of a home-cooked meal.  I want my life to be more like that, and this summer I am going to make it so.


Read Full Post »

Our Fudge Obsession

Image

The day after Thanksgiving is one of my favorite days of the year. After the feasting from the previous day, my family is still at my parents’ farm. We don’t go shopping. We don’t go to town to the Treasure Hunt. We play Christmas records, get out Christmas decorations, and make homemade candy.

Some of the candies change from year to year. Mom’s favorite is the Texas Millionaire. Aunt Gale’s favorite is Divinity (blech).

And we always have at least one type of fudge.

When we were little, my sister and I didn’t really like fudge. We weren’t fond of dark chocolate, and we were generally content with store-bought candy. This was unacceptable to my mother, so one year, she made Fantasy Fudge. It’s a light, milk chocolate fudge. I think she got the recipe off the back of the Marshmallow Creme jar. For a long time, it was my favorite.

As our tastes matured, we started to like Mom’s chocolate peanut butter fudge, which is very similar to this recipe. Her use of a variation of this fudge as the frosting to her chocolate cake probably helped us make that transition.

Yes. You read that right. My mom uses fudge to frost her chocolate cake. Go and do likewise, but make sure that you have a nice place to lie down afterward, because you’re going to need it.

Mom is particular about a lot of things, but the process of candy-making takes her pickiness to a whole new level. There is a right size and shape for every candy. There is a right way to pack them. And every year, she reminds me that the fudge has to get to exactly 235 degrees, or it won’t set up, and then we’ll be forced to eat it straight out of the pan with a spoon or slathered on macaroons or vanilla wafers. And wouldn’t that be terrible?

If by “terrible,” one means “glorious,” then yes. Yes, it certainly would.

And that is the beauty of fudge. It’s not difficult to learn to do well, but even if you mess up (assuming you don’t scorch it – that really is terrible), you’ve still got a pan of butter, chocolate, sugar, and cream, so the end result is going to be wonderful, no matter what it looks like.

If I’m making fudge for other people, I’ll make one of the recipes above. They’re both crowd-pleasers.

But if I’m making a special fudge treat just for me, I make it vegan, and I make it pour-able.

This recipe has many uses. It’s good on waffles. It’s good on fruit. And it’s amazing when poured over a chocolate espresso cake.

Vegan Hot Fudge

In a double boiler, whisk together and heat, stirring often:

  • 1 cup full-fat coconut milk
  • 1/2 cup baking cocoa

When it starts to steam like it’s about to boil, whisk in:

  • 4-6 Tbs (to taste) agave nectar (I also have used maple syrup or a simple syrup that I had left over from cocktail night)

At this point, if one were so inclined, one could stop and enjoy it as a nice drinking chocolate. One might also find this to be a pleasant addition to coffee.

But if you’re committed to hot fudge, stir in:

  • 1 Tbs coconut oil
  • 1 Tbs each of vanilla extract and bourbon (unless you’ve had the foresight to make your own bourbon vanilla. Then just add two tablespoons of that).

If you want a thicker sauce, add a little (1-2 tsp) cornstarch with the cocoa at the beginning.

Remove from heat and pour into a glass jar to cool. I imagine that it will keep in the fridge for about a month, but mine never lasts that long, so don’t hold me to that.

My hot fudge might be a fairly distant cousin of the fudge I grew up with, but it still brings back memories of home, family, and tradition.

Read Full Post »

Vanilla Coconut Waffles

My sister and brother-in-law got me a waffle-maker to replace Old Faithful that finally died a sad, smoky death early in the fall, so naturally, I was itching to use it.  What better way to do so than to introduce my first vegan treat of the year?

Image

Food photographer, I am not.  Ignore the towel.  Concentrate on the golden brown fluffiness.  Also, my vintage Fiestaware is super cute.

Moving on…

These waffles are the result of various trials and recipes.  I consulted this recipe from allrecipes.com and Mark Bittman’s How to Cook Everything to help guesstimate the ratio of the ingredients.  Then I deleted and substituted those ingredients to make them vegan.  Then I squinted and fussed and bent the ingredients to my will until the batter looked like it should and produced what I wanted.  I like a crisp waffle, but some people like them puffier, so if you’re one of said people, just beat the batter for an extra minute or two, and that will help it out.

I also flat-out ignored the piddly 1/2-teaspoon – 1 teaspoon nonsense with the vanilla.  I didn’t measure what I used exactly, but I did pour it like I was about to do a shot.

Vanilla Coconut Waffles

Yields 6-7 waffles

1.  Preheat waffle iron and brush with coconut oil.

2.  Sift together:

  • 2 cups AP flour (I’ve also done these with whole wheat, but ease up on it if you do – 1 3/4 cup at most)
  • 3 teaspoons baking powder
  • 1/4 teaspoon salt

3.  In a separate bowl, mix together:

  • 1/2 cup Earth Balance (I use soy free) or coconut oil (my personal preference), melted and cooled
  • 1 tablespoon of sugar
  • 1 3/4 – 2 cups (start with 1 3/4 and add more if the batter looks too thick at final mix) full-fat coconut milk
  • 1 healthy dose (around 1 1/2 tablespoons…or to taste.  Whatever.) vanilla extract

4.  Mix the contents of both bowls together, adding more coconut milk if the batter looks too thick (i.e., moves more like molasses than waffle batter).

5.  Stir in about a cup of shaved coconut (I use unsweetened, but sweetened is fine, too).  Mix thoroughly.

6.  Pour onto waffle iron.  When it stops steaming, it’s done!

I love breakfast, and I especially love these waffles.  They are a quick fix, and they freeze beautifully.  Enjoy!

Read Full Post »

%d bloggers like this: